
How to Get Your Website Indexed by Google (Faster)

I just Googled my own website, sadly it didn’t show up in the search results. I didn’t panic though, as I know it can take some time before Google crawls and indexes a brand new website.
Though, how long does it take to get a website indexed by Google?
A single day and up to 4 weeks, from the moment you’ve made your website crawlable for Google’s spiders. It’s possible to speed up the crawling process by connecting both Google Analytics and Search Console to your website and submitting your website’s sitemap.
Most of the time, setting up these connections will get your website indexed in a matter of days. Though sometimes the reason why Google isn’t indexing your website might be very different.
Making your website crawlable for Google’s spiders
At the time of writing this blog post, more than 327 million domain names have been registered. Of Course, not all of these domains actually have a live website running on them. Though this will give you a general idea of how large the internet actually is.
Google is working all day long to index domains that have websites on them. In fact, their spiders are crawling every page for all existing websites, and this takes time. Though, before a spider can crawl a website, it will need some way of knowing it actually exists.

This could be as simple as a link pointing directly to a home page. Though most brand new websites won’t have any links pointing to them. That’s why it’s good practice to make your website known to Google by submitting a sitemap through Google Search Console.
Another way to notify Google of your website’s existence is by connecting it to Google Analytics. Once you’ve created an Analytics account, also connect it to your Search Console account. That way, all your search traffic data will be viewable from inside Analytics itself.
All this might feel a little overwhelming, but rest assured. Creating these accounts and connecting them to your website can be done in less than an hour. I’ve created a helpful step-by-step guide on how to set everything up properly.
Though there are some issues that might prevent Google from indexing your website entirely.
Indexing issue checks
The first thing you should try is using a proper search query. It takes quite a while for new websites to rank on Google. Your website could be indexed already, without you knowing it. To find out which of your URLs have been indexed by Google, use this query: site:domain.tld
This is the search query I use for this website site:learnaboutwebsites.com. Or you could just click this link to get the same result. Just make sure you don’t add a space between “site:” and your domain name. You need to enter this query without any spaces at all.
The second check is to enter your full domain name into your browser’s address bar. If your website doesn’t show up, it could be a DNS propagation problem. When connecting your domain name to your web host for the first time, it can take up 48 hours to propagate.
Your website needs to be accessible through your domain name. There’s just no way for Google to crawl your website if it’s not available yet.
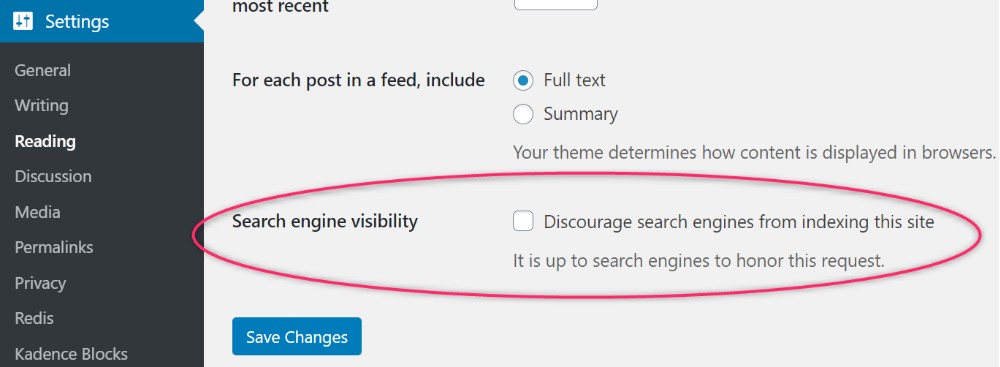
Though if your website does load, there are more checks you can do. Though this only applies when you’re using WordPress as your CMS. First login to your WordPress Back-end. Then click on “settings” and select “reading”. Make sure the “Search Engine Visibility” is unchecked.
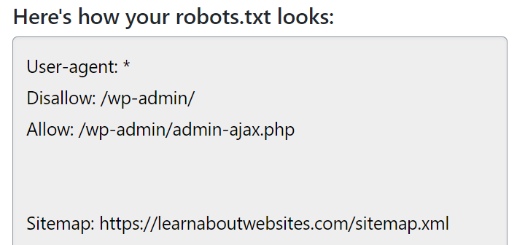
And if you’re using an SEO plugin like “All In One SEO” or “Yoast”, make sure it isn’t blocking your pages and posts from being indexed. Also, check if there’s functionality for creating a robot.txt file. This will help the Google Spiders figure out what it’s allowed to index.
The final check only applies if you’ve bought a 2nd hand domain name. As your domain name might have been blacklisted, due to shady practices. You can check out which domains have reported copyright issues by using Google’s Transparency Report.
Just enter your domain name in the search field and press enter. If nothing shows up, you’re OK. Another nifty tool is Google’s Safe Browsing, where you can find websites that have been compromised. If you enter your domain here and get a hit, that might be the issue.
What is a sitemap? (and how to create one)
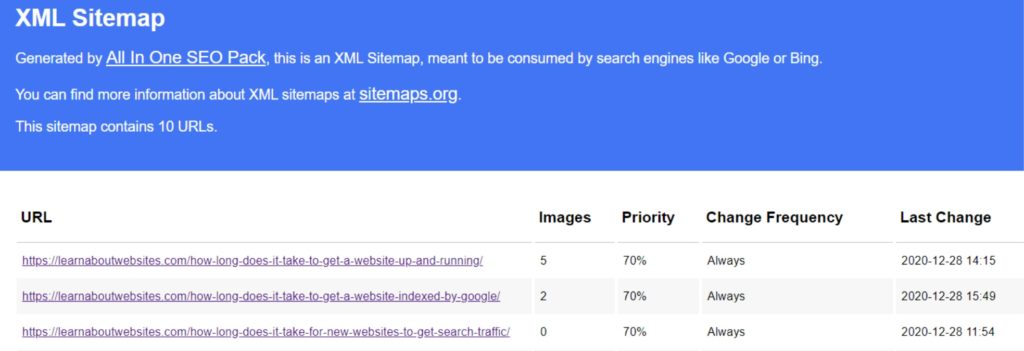
A sitemap is a blueprint of your website’s layout. It contains the URLs for all web pages, posts, and images you want Google to index. It’s actually very similar to the road map installed on your car’s navigation system (GPS).
Sitemaps make it a lot easier for search engine spiders to navigate your website. If you’d like to see what your website’s sitemap looks like, all you have to do is add “/sitemap.xml” after your domain name, like this: https://learnaboutwebsites.com/sitemap.xml.
Although having a sitemap for your website makes sense, it’s not mandatory to have one. As Google will still be craw your website even if you have a sitemap available. This is why it’s so to use internal links to every page you create.
Creating a sitemap for your website isn’t something you should do manually. As it’s very time-consuming and prone to making mistakes. Luckily website builders like Wix and Squarespace will create a sitemap for you.
If you’re using WordPress as your CMS, installing an SEO tool will do the job. Both “All In One SEO” and “Yoast” already have this functionality baked into them. Alternatively, you could install a WordPress plugin called Google Sitemap Generator to do the work for you.
Though if you’re not using these kinds of platforms, there’s still a way to make things easier. XML-Sitemaps only require your website’s homepage URL for generating a full sitemap. Just make sure the pages you want indexed are linked to each other.
As you might have noticed, I’ve used the phrase “you WANT indexed” several times. Because sometimes you might not want certain web pages to be indexed at all. For example: “Log-In Pages”, “Thank-You Pages” or any other pages, you don’t want to appear in the search results.
Though not including a page in your sitemap doesn’t mean Google won’t find it. You’ll have to explicitly let Google know you don’t want that page to be indexed. You can do so by adding a “noindex” meta tag to the header section of that specific web page.
Don’t exclude the page by adding it to your robot.txt file, as you actually want search engines to find that “nofolow” meta tag.
Submitting your sitemap to Google
In order to submit your sitemap, you’ll need to have access to your website’s property in Google Search Console (formally known as Google Webmaster Tools). Though first, you’ll need to have a Google account to be able to gain access to Google Search Console.
If you haven’t created a Google account as of yet, just click on this link, fill out the forms and accept the terms of service. Then follow the step below
- Open Google Search Console
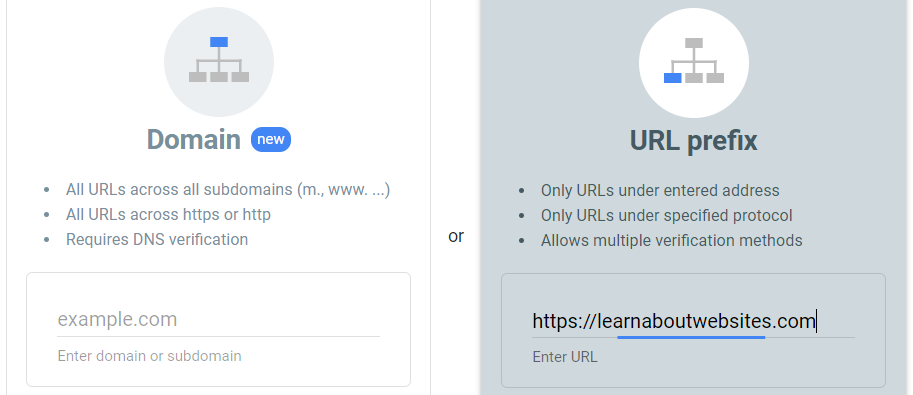
When prompted, log in with your Google account’s credentials - Select the “URL Prefix” Property Type
That’s the form located on the right. Using the “Domain Property Type”,
may cause issues when connecting Search Console to Analytics - Enter your website’s full URL and press “Enter”
Including the https:// prefix and the “www.” if you’re using it
If you don’t have an SSL certificate use http:// (without the “s”) - Choose one of the “Ownership Verification” methods
I’ve explained one of these methods in more detail below - Click on “Sitemaps”
Located on the left side menu - Enter the name of your sitemap and press enter
For most websites, this will be “sitemap.xml”
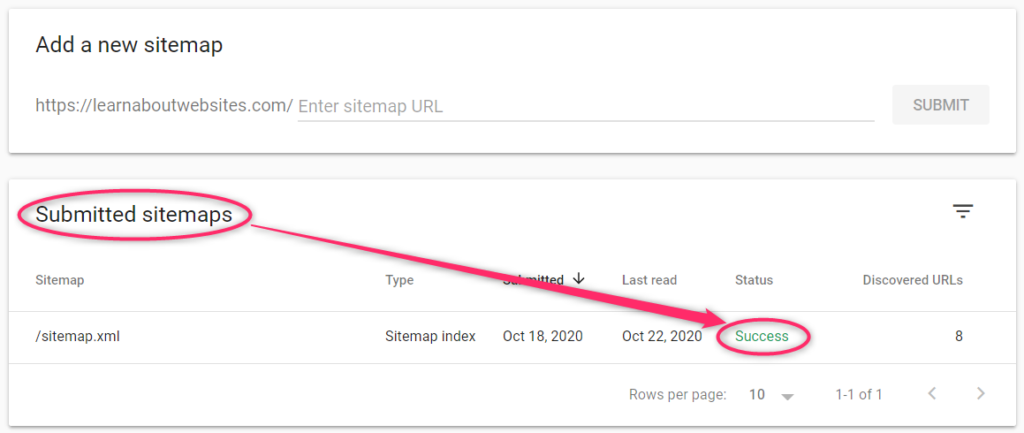
After following these 6 steps your sitemap should appear under the “submitted sitemaps” section. If the status is “Success”, I want to congratulate you on successfully submitting your sitemap to Google.
Ownership Verification (Using Google Tag Manager)
I’ve skipped over the Ownership Verification, as this part actually deserves a more detailed explanation. You need to verify that you’re the owner of the domain name and website. This is a necessary security feature, as you don’t want your search data to be publicly available.
In my humble opinion, the best way of doing this is through Google Tag Manager. In all honesty, this will add an additional layer of difficulty. Though you’ll be more flexible when future changes are needed. Notice the word “when”, not “if”.
Side Note: As I’m writing this post Google released their new version of Analytics. The SEO plugin I’m currently using, doesn’t support the new Analytics version yet.
Verify Ownership (Website Builder)
If you’re using a website builder, you’re in luck. Because these kinds of platforms make it very easy to connect all kinds of integrations. Though in some cases they might charge you an additional fee for using such integrations.
Luckily the Google Tag Manager and Analytics integrations are free* of charge at Wix. Just click on “Marketing & SEO” on the side menu and select “Marketing Integrations”. All you have to do is select an integration and add your Google Tag Manager account ID.
* You’ll need to have your domain connected and be on one of their premium plans. You can’t use these integrations when you’re on their free tier
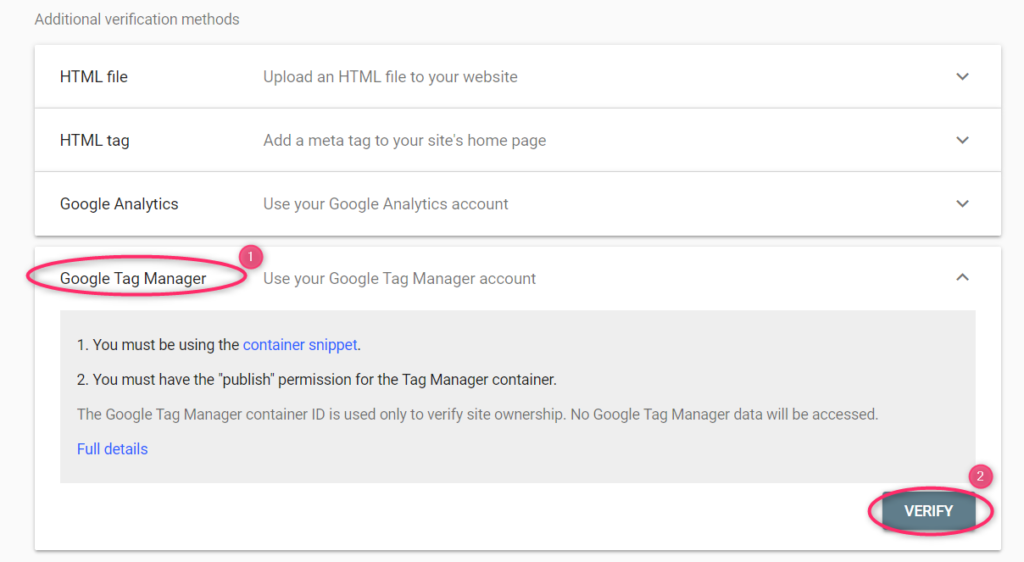
Once you’ve connected to Google Tag Manager, go back to your Google Search Console. Then click on “Settings” (located in the side menu) and expand Google Tag Manager by clicking on it. The final step is to click on the grey “Verify” button, and you’re done.
Verify Ownership (WordPress)
When you’re using WordPress, you’ll need to invest some more time. Though it’s not that difficult when you know how to set it up. All you need to do is install a plugin and copy and paste some code snippets from one application to another. Here are the steps:
- Install a plugin called: YYDevelopment – Tag Manager – Header, Body And Footer
In WordPress –> Plugins –> Add New –> type in: “header, body” - Click on the “Install” button
- Once installed click on the “Activate” button
- Open Google Tag Manager
- Click on the “Create Account” button
- Fill out the required information
The names don’t really matter that much, just make sure you select “Web” - A popup window will appear with the code snippets
- Copy the codes from Google Tag Manager to the WordPress Plugin’s settings page
You’ll have to copy and paste both snippets - Click the “Insert/Update Tags” button on the WordPress Plugin’s settings page
This button is located at the bottom of the settings page
Once you’ve connected to Google Tag Manager, go back to your Google Search Console. Then click on “Settings” (located in the side menu) and expand Google Tag Manager by clicking on it. The final step is to click on the grey “Verify” button, and you’re done.
Key Takeaways
- Don’t panic if your website hasn’t been indexed yet, patience is key
- It can take a single day up to 4 weeks before Google gets around to indexing it
- Be sure to use the proper search query “site:domain.tld”, when checking
- Beware of DNS propagation and your WordPress indexing settings
- To speed up the indexing process:
- Get links pointing directly to your home page (Tip: Use Social Media)
- Create accounts for both Google Search Console and Analytics
- Create a sitemap and submit it to Google Search Console